
-
Email:zhao@hyliec.cn
-
Tel:+86 311 85273988
-
WhatsAPP:8613931128750


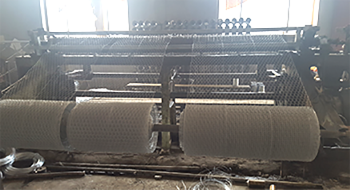
/Chicken Wire Installation A Comprehensive Guide Chicken wire, also known as poultry netting, is a versatile and widely-used fencing material, ideal for keeping chickens and other small animals contained while also protecting gardens from pests. Installing chicken wire is a straightforward process, but it requires some preparation and attention to detail to ensure maximum effectiveness. Below is a comprehensive guide to help you successfully install chicken wire. Materials Needed Before beginning your chicken wire installation, gather the necessary materials 1. Chicken Wire Available in various heights and gauge thickness. Choose the appropriate width based on your needs – typically, a height of 3 to 5 feet is sufficient for a chicken coop. 2. Wooden or Metal Posts These will serve as the support structure for your chicken wire. Pressure-treated wood, metal T-posts, or wooden fence posts are common choices. 3. Wire Cutters Essential for cutting the chicken wire to your desired length. 4. Gloves Protect your hands from sharp edges. 5. Fencing Staples or Nails For securing the chicken wire to posts. 6. Hinges and Latch If you plan to install a gate, these are necessary for functionality. 7. Hammer or Staple Gun For attaching the wire to the posts. Step-by-Step Installation Step 1 Planning Your Layout Before starting, plan the layout of your chicken wire installation. Decide where you want the fence to go and measure the area. Consider the shape – whether it’s a rectangular, square, or circular area. Remember to maintain enough space for your chickens to roam freely while ensuring the perimeter is secure from predators. Step 2 Setting Posts Next, mark the locations for your posts. Posts should be placed about 6-8 feet apart to provide adequate support for the chicken wire. Use a post hole digger to create holes that are at least 2 feet deep for stability. Place the posts in the holes and fill them with dirt or concrete to secure them in place. Ensure the posts are straight and level before the concrete sets. chicken wire installation Step 3 Cutting the Chicken Wire Once the posts are securely in the ground, measure and cut the chicken wire to fit the distance between your posts. It’s often beneficial to have an extra foot of wire to ensure adequate coverage and to allow for overlap at corners or gates. Step 4 Attaching the Chicken Wire Starting at one end, unroll the chicken wire and stretch it tightly between the posts. Use fencing staples or nails to attach the wire to the wooden posts, placing them every 12-18 inches for maximum stability. If using metal posts, secure the wire with wire ties. Be sure to leave enough slack at the bottom of the wire to bury it or to allow for any uneven ground. Step 5 Adding a Gate If you plan to access the enclosed area regularly, consider installing a gate. Cut a section of the wire to fit a frame made of sturdy wood or metal. Attach hinges to one side of the gate frame and secure it to a post. Install a latch on the opposite side to keep the gate closed when not in use. Step 6 Final Touches Inspect the entire fence to ensure it is secure and does not have any gaps that predators could exploit. If necessary, consider burying the bottom of the chicken wire a few inches underground to prevent digging animals from entering. Additionally, you may want to top the fence with barbed wire or another deterrent, particularly if larger predators are a concern. Conclusion Installing chicken wire is a rewarding project that can enhance the safety of your chickens and the health of your garden. By carefully planning your layout, choosing the right materials, and following these steps, you will create a secure environment for your feathered friends. Whether you are a seasoned installer or a first-time DIYer, this guide will help ensure a successful chicken wire installation. Happy fencing!

-
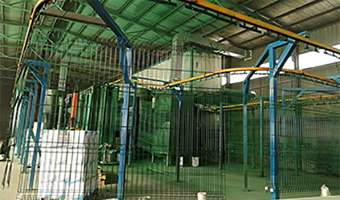
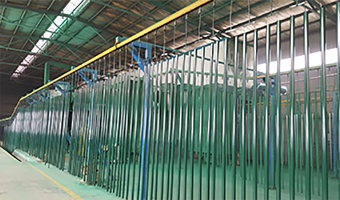
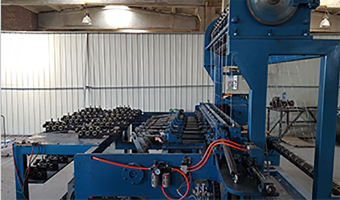
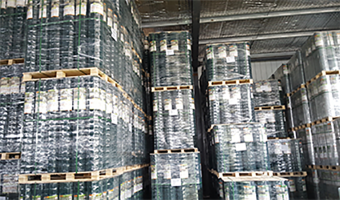
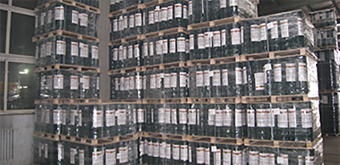
 Rich export experienceRich experience for fencing production and export to North of America, Europe, South of America, and South of Africa more than 20 years.
 -
Complete product systemThe Maintenance free coatings coupled with a durable design offer owners and developers a products that can match all project requirements for safety
-
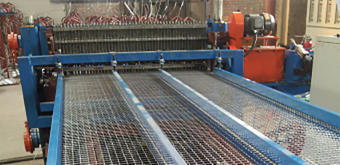
High-quality productsHigh quality control and specialist team for production process, inspection, packaging, QC Etc. to meet customer requirements.
-
Excellent serviceProvide professional technical support to customers, High quality after- sales support ensures that customers have no worries at all.
-
 Durable 6 Foot Chain Link Fence Gates for Secure Outdoor Enclosures and Access SolutionsUnderstanding the 6-Foot Gate for Chain Link Fencing When it comes to securing properties, the choic2026-04-04 15:59
 -
 Durable 5-Foot Welded Wire Fencing for Secure Landscaping and Animal EnclosuresThe Versatility and Benefits of Welded Wire Fencing A Focus on 5-Foot Options Welded wire fencing is2026-04-04 15:46
 -
 Durable 48-inch Welded Wire Fence for Versatile Outdoor Applications48-Inch Welded Wire Fence A Durable and Versatile Solution for Your Needs When it comes to securing2026-04-04 14:43
 -
 Creating Engaging Designs for Social Media with a 2x2 Square FormatThe Versatile Appeal of a 2x2 Square Post A Visual and Practical Marvel In our increasingly digital2026-04-04 14:29